Voice over Internet Protocol (VoIP) lets calls travel over the internet instead of traditional phone lines, giving businesses more flexibility and cost savings. Switching to a new phone system can feel confusing, but it doesn’t have to be.
This Business VoIP Checklist shows you step by step how to set up VoIP for a small business. Many businesses that have switched to VoIP report significant savings on phone costs; recent studies show reductions of up to 50% while also gaining more flexibility and features.
This guide provides step-by-step instructions for a successful VoIP deployment and solutions to common issues that may arise during installation.
✨ Key Takeaways
- A VoIP installation checklist helps businesses set up their phone system with the right preparation, equipment, and provider.
- The process includes signing up, porting numbers, configuring profiles, connecting devices, and testing call quality.
- Addressing common VoIP issues such as poor call quality, dropped calls, or one-way audio ensures reliable communication from day one.
What is a VoIP checklist?
A VoIP checklist is a step-by-step guide that helps businesses plan, set up, and launch their internet phone system without problems. It ensures that your internet connection, devices, security settings, and call features are ready before you go live.
A well-structured VoIP deployment checklist goes beyond simple installation, it covers planning, network preparation, number porting, system configuration, and testing. By following a clear checklist, businesses can avoid downtime, reduce technical issues, and ensure a smooth VoIP rollout from day one.
A complete VoIP deployment checklist usually includes:
- Business planning – Define users, phone numbers, call volume, and required features.
- Network readiness – Check internet speed, latency, jitter, and enable QoS settings.
- Hardware setup – Prepare IP phones, headsets, softphones, routers, and switches.
- Security setup – Configure firewalls, encryption, and secure access controls.
- Provider setup – Sign up, port numbers, create extensions, and configure call flow.
- System testing – Test internal and external calls, voicemail, caller ID, and routing.
- Team training – Guide employees on how to use the new phone system properly.
How to install VoIP with a business VoIP checklist?
You’ll first need to understand your voice communications requirements before starting the VoIP phone system installation process. Here is the list of preparations before VoIP installation and configuration.
1. Define your business needs
The question “What does your business actually want to achieve with VoIP services?” should serve as the baseline for identifying your business needs. Don’t just start exploring VoIP providers before getting a clear understanding of your requirements. Ask questions like:
- How many people will be using this business phone system?
- What are the plans for expanding the area and operations?
- How many business phone numbers are active, and what’s your calling pattern?
- What is your actual budget from monthly fees to setup, hardware, and add-on features?
- What are the standards, security regulations, and compliance in different countries?
- Do you make lots of outbound international or inbound local calls?
Considering all these questions will give you a good idea of your business needs, helping you make an informed decision to find a suitable VoIP platform and avoid any regrets later.
While identifying your business needs, it’s also important to separate broader business objectives from more practical communication goals. Many companies confuse the two, but making this distinction ensures your VoIP setup aligns with both long-term strategy and day-to-day operations.

2. Evaluate your feature needs
The features offered by the VoIP system are overwhelming. Not every feature is useful to your business. So, it’s very important to understand what VoIP features are needed, which prevents you from overspending on unnecessary tools.
Make a VoIP checklist of features that are important for your business operations, so that every single penny of yours is spent on the right tool.
- Call routing: An Automatic Call Distribution (ACD) feature that automatically directs inbound calls to a specific department, team, or person.
- Voicemail to email transcription: Converts voice messages into text automatically for quick access and review.
- Mobile integrations: Offers flexibility by allowing employees to use smartphones as part of the office phone system.
- Video conferencing: Provides a high-quality platform for face-to-face virtual meetings and collaborations.
- Instant messaging: Supports quick communication, both internal and external.
- Auto attendant: Automated IVR systems to greet, handle, and direct callers with prerecorded messages or menu options.
Get features that add value to your operations. Do not get swayed by extravagant features that gonna cost you more later on.
3. Assess your current infrastructure
Your current infrastructure needs to support your new VoIP system if you are planning to save money on new infrastructure. So, it is important to examine whether your current infrastructure can handle the demands of new VoIP phones. Running a thorough checkup of your system at this stage helps you prevent unexpected downtime. Key areas to review include:
- Internet bandwidth: Your connection needs to provide enough speed and stability for multiple concurrent calls without affecting other business applications.
- Network equipment: Routers, switches, and firewalls should be VoIP compatible.
- Wiring and cabling: Your current Ethernet cabling (Cat5e, Cat6, or higher) should deliver the required power and data for IP phones.
- Existing hardware: Your existing computers, CPU, headsets, or softphone devices should meet the VoIP software requirements.
- Security measures: Your firewalls, encryption protocols, and network segmentation should protect your calls against any threats.
4. Check your internet connection
Voice over Internet Protocol depends on a fast and stable internet connection. You’ll need a reliable connection to maintain consistent and high VoIP call quality. You’ll also need an upload bandwidth of around 100Kbps or 0.1 Mbps per active phone line to ensure your VoIP services operate smoothly.

You can use online speed tests to check the condition of your internet connection. These test tools are specifically designed to check the overall upload and download speeds, latency, jitter, and packet loss.
Here are three important factors that ensure the stability of any internet connection.
| Factor | Acceptable range | Definition |
| VoIP Jitter | Under 30 milliseconds (ms) | Network stuttering |
| Latency | Below 150 30 milliseconds (ms) | Time lag |
| Packet loss | Less than 1% | Missing audio segments |
5. Choose a VoIP phone system service provider
Once you’ve implemented VoIP systems, it’s difficult to switch to a new one because it’s gonna cost you money and a delay in your overall operations. Therefore, it’s best to take your time evaluating various providers now and find the one that’s best for your call center.

Make a VoIP phone installation checklist to make sure not a single error is in sight.
- Check if the providers offer the features that are on your must-have list.
- Can the provider keep up with your growing business needs and changes in technology?
- Is their customer support reliable?
- Do they provide VoIP implementation instructions and onboarding support?
- Is there absolute transparency in their contracts?
- Does its pricing structure align with your budget?
Which VoIP Codec Should You Use for Your Business?
A VoIP codec determines how voice is compressed and transmitted over your network. Choosing the right codec directly affects call quality, bandwidth usage, and infrastructure cost.
Here is how the three most common VoIP codecs compare:
| Codec | Bandwidth per Call | Audio Quality | Best For |
| G.711 | 64 Kbps | High (uncompressed) | Offices with high bandwidth and LAN-based calls |
| G.729 | 8 Kbps | Medium (compressed) | Businesses with limited bandwidth or many concurrent calls |
| Opus | 6–32 Kbps | High (adaptive) | Remote teams, softphones, and variable network conditions |
How to choose:
- G.711: Use when bandwidth is not a constraint and call quality is the top priority.
- G.729: Use when supporting high call volumes on limited bandwidth; expect slight audio compression.
- Opus: Use for remote or hybrid teams using softphones or mobile apps; adapts automatically to network conditions.
Quick calculation: Multiply your chosen codec’s bandwidth by the number of concurrent calls to estimate the total VoIP bandwidth requirement.
Example: 10 concurrent calls using G.711 = 10 × 64 Kbps = 640 Kbps (0.64 Mbps) reserved for voice traffic alone.
Step-by-step guide for VoIP Installation
After choosing a desired VoIP provider, here’s how to install VoIP phone system:
Step 1: Sign up with your provider
The very first step in setting up your VoIP system is to sign up for an account with your selected provider. Choose your desired service plans, business phone number, and add-ons. Download the necessary applications on your devices, provide your business information, and make a payment.
Step 2: Port your existing phone numbers if needed
If you don’t want to confuse your customer with a new number to reach out to you, then it’s best to keep your existing number. For this, you’ll need to port your existing number. To start the porting process, inform your current provider, send a letter of Authorization (LOA), recent phone bills, and all other necessary documents.

It’s best to start your porting process before canceling your old service to avoid any disruptions, as the process can take time depending on the service providers or the complexity of your system.
Step 3: Set up your VoIP profile and preferences
Once your account is active, log in to your provider’s online portal or app to adjust settings and personalize the system.
- Add and manage users: Decide who needs access to the system and assign permission levels based on roles.
- Create extension and ring groups: Develop a logical numbering system that’s easy to remember. Set up ring groups to ring multiple phones at once.
- Design your call flow: Build a professional caller journey and decide how incoming calls should flow.
- Configure voicemail and call forwarding: Record personalized voicemail greetings and set up call forwarding to other phones or alternative numbers for added flexibility.
- Apply security settings: Update passwords, enable two-factor authentication for admin accounts, and review encryption options to keep calls and data secure.
Step 4: Connect the necessary hardware or equipment
With your VoIP profiles configured, the next step is to set up the physical devices that will support your system. However, remember that the exact setup will depend on the type of equipment your team will be using.

- VoIP desk phones: Connect IP phones directly to your Ethernet ports. If your office uses Power over Ethernet (PoE), the phones will receive both data and power through the same cable. Otherwise, plug them into a power adapter.
- Analog telephone adapters (ATAs): If you’re keeping older analog phones, use an ATA device to connect them to your VoIP service.
- Headsets and softphones: For teams using computers or mobile apps instead of desk phones, connect compatible USB or headsets.
Step 5: Adjust your router settings to enable QoS
Configure your router to prioritize voice traffic. You can do this through a feature called Quality of Service (QoS). This ensures that VoIP packets are given higher priority.

Quick QoS setup checklist:
- Log in to your router’s admin dashboard using its IP address.
- Locate the QoS settings section
- Add your VoIP devices by their MAC address or IP address
- Set VoIP traffic or applications to the highest priority level available.
- Save changes and restart your router.
- Test call quality to confirm settings are working as expected.
Step 6: Run tests to confirm everything works properly
It’s important to verify that all components of your VoIP systems are functioning after the completion of your setup. Testing all components helps identify potential issues early and ensures your team has a smooth experience from day one.
What to test:
- Internal and external calls: Place calls within the office and outside numbers to confirm audio clarity, volume, and connection stability.
- Call duration: Make a longer call (at least 20 minutes) to spot lag, jitter, echo, or dropped calls that could signal network or hardware problems.
- Number assignments: Call each direct number to ensure it rings the correct phone or extension.
- Voicemail and routing: Leave and retrieve voicemails, test call forwarding rules, and verify that auto-attendant menus function correctly.
- Caller ID verification: To confirm what number shows up during outbound calls, dial 1-800-444-4444 (MCI’s Automated Number Announcement Circuit) and check the ANI (Automatic Number Identification) being sent.
Addressing common VoIP issues
VoIP issues are bound to happen even if you did an excellent job while planning and implementing your VoIP systems. Here are common VoIP problems and their solutions:

Poor call quality causes choppy audio, echo, and delay.
Low call quality is one of the most common VoIP issues. It is often caused by network congestion or poor internet performance. Weak bandwidth, interference from other devices, or even relying only on Wi-Fi can all cause problems such as echo, delay, or choppy audio.
How to fix it:
- Run an internet speed test to confirm you have enough bandwidth for concurrent calls.
- Close any bandwidth-heavy applications (e.g., large downloads, streaming services) during calls.
- Switch from a Wi-Fi connection to a wired Ethernet for greater stability.
- Use a quality headset to reduce background noise and echo.
- Enable QoS in your router to prioritize voice traffic.
- If problems persist, contact your VoIP provider to check for service-side issues.
Dropped calls
Network instability, wireless interference, or outdated device firmware can all contribute to the dropped calls. Frequent drops disrupt conversations, which can affect customer trust.
How to fix it:
- Perform continuous ping tests or use a connection monitoring tool to monitor your internet stability.
- Pause video streaming or large downloads during calls to reduce bandwidth strain.
- Restart your router or modem to clear temporary glitches.
- Update your firmware to the latest versions.
- If using mobile data, enable Wi-Fi Calling or move to an area with a stronger signal.
- Document when and how often calls drop, then share this with your internet provider or VoIP provider to help pinpoint the source of the issue.
One-way audio
One-way audio is an issue where the caller can hear the receiver, but the receiver cannot hear the caller, and vice versa. This issue is often caused by speaker or microphone settings, especially with softphones.
How to fix it:
- Check your firewall settings to make sure VoIP ports (commonly SIP and RTP) are open.
- Verify your NAT (Network Address Translation) settings on your router, as improper configurations can block audio streams.
- Restart your VoIP phones and networking equipment to refresh connections.
- Test calls on both wired and wireless connections to rule out Wi-Fi interference.
- If the problem continues, contact your VoIP provider for help adjusting SIP or RTP settings on their end.
No dial tone or cannot make calls
The issue of no dial tone or your calls not connecting may be related to device registration, power supply, or network connectivity. Sometimes misconfigured settings or SIP (Session Initiation Protocol) account problems can also prevent calls from going through.
How to fix it:
- Check power connections on your VoIP phones or adapters to ensure the device is properly powered on.
- Log in to your provider’s portal to confirm the device is registered or linked to the correct user or extension.
- Double-check SIP credentials (username, password, server address).
- Test with another device or softphone app to determine if the problem is device-specific.
- If the issue persists, contact your VoIP provider’s support team to check for account-level or service-side issues.
VoIP device not powering on
When a VoIP phone or adapter won’t power on, the problem usually comes down to a faulty power supply, incorrect cabling, or hardware failure. In the office using PoE, the issue may also stem from switch configuration or insufficient power being delivered through the network.
How to fix it:
- Confirm the device is securely plugged into a power outlet or PoE-enabled switch.
- If using a power adapter, test it with another outlet or try a different adapter if available.
- For PoE setups, check that the switch is properly configured to supply power and that the port is active.
- Inspect the Ethernet cable for damage and replace it if necessary.
- Restart the switch or router if multiple devices are affected.
- If the device still won’t turn on, test it on another phone on the same connection to rule out hardware failure.
- Contact your provider or device manufacturer if the hardware requires repair or replacement.
Learn more about 👉: Common VoIP Myths Debunked
Business VoIP Installation Checklist
Below is a summary of a VoIP installation services checklist for a quick scan:
| Phase | ||
| 1. Research & planning | 2. Migration & setup | 3. Post-setup & testing |
| Define phone system needs (List users, extensions, phone numbers, and must-have features) | Sign up with the provider (Create your account, choose a plan, and register users) | Run tests (Test internal/external calls, caller ID, number saaignments) |
| Check the internet connection (Test bandwidth, latency, jitter, and packet loss) | Port existing phone numbers (Submit LOA, recent bills, and required documents) | Confirm phone numbers (Test outbound caller ID and inbound call paths) |
| Assess infrastructure (Review routers, switches, cabling, security protocols, and existing devices) | Configure VoIP profile (Add users, extensions, ring groups, and call flow) | Install VoIP apps (Deploy apps on mobile and desktops for remote access) |
| Choose a VoIP provider (Compare plans, pricing, support, features, scalability, and contract terms) | Connect equipment (Set up IP phones, ATAs for analog phones, or headsets with softphones) | Record greeting (Upload voicemail greetings and set up auto attendants/IVR flows) |
| Select equipment (Decide on desk phones, headsets, ATAs, or softphones) | Adjust router QoS (Configure QoS to prioritize VoIP traffic) | Train your team (Provide guidance on system navigation) |
How Much Does It Cost to Set Up a VoIP Phone System?
VoIP installation cost depends on your deployment model, team size, and required features. Here is a breakdown of the three main deployment types and what each typically costs:
| Cost Factor | Hosted VoIP | On-Premises PBX | Softphone Only |
| Setup cost | Low ($0 – $100) | High ($1,000 – $10,000+) | None |
| Monthly per user | $15 – $50/user | $5 – $15/user (after setup) | $10 – $30/user |
| Hardware required | IP phones (optional) | Servers, SIP phones, cabling | Headset only |
| IT maintenance | Managed by the provider | In-house IT required | Minimal |
| Best for | SMBs, remote teams | Large enterprises with IT staff | Remote/hybrid teams |
| Scalability | High | Low – Medium | High |
Hidden costs to watch for:
- Number porting fees — some providers charge $5–$20 per number
- Add-on features — call recording, analytics, and CRM integrations are often not included in base plans
- Hardware costs — IP desk phones range from $50 to $300+ per unit
- International calling rates — verify whether your plan includes or charges per minute for outbound international calls
Cost-saving tip: Businesses with remote or hybrid teams can eliminate hardware costs entirely by deploying softphones, reducing setup costs to near zero while maintaining full VoIP functionality.
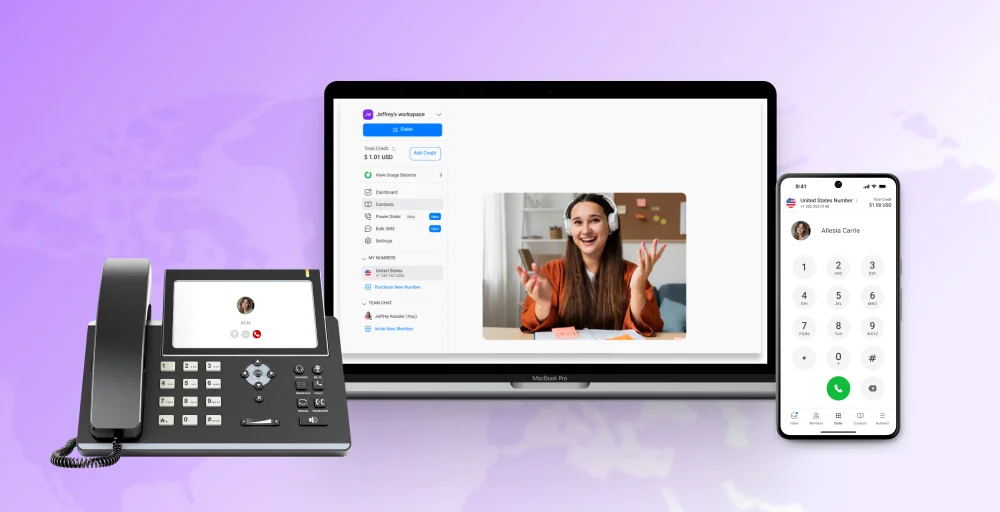
Adopt VoIP with certainty with KrispCall
Installing a VoIP phone system doesn’t have to be complex. With the right planning and a reliable provider, you can set up a professional business telephony solution in just a few steps. KrispCall makes it easier with user-friendly dashboards, seamless number porting, advanced features, and reliable call quality.
Switch to KripCall today and manage all your business conversations from one unified platform that will grow with your business.