

Want to create an Apple Id without a phone number?
An Apple Id is necessary if you want to use Apple services like sign in to iCloud backup, Apple music, install apps and make purchases from the App Store. But creating an Apple Id requires a valid phone number where the verification code will be sent.
While adding a phone number aids in identity verification, many people want to bypass the phone number verification requirement during Apple account creation.
If you are also one of those people and looking for ways to get an Apple Id without a phone number, we got you covered.
In this blog, we will discuss many methods that will help to bypass the phone verification step and create an Apple account without a phone number.
Without further dues, let’s get started. 👇
Why Does Apple Ask for Phone Number Verification?
Here are some other reasons why Apple might ask for phone number verification:
- To verify your identity when you sign up for a new service.
- To send you security alerts if there is suspicious activity on your account.
- To track your location if you lose your device.
- To send you marketing messages about Apple products and services.
How to Create an Apple ID without a Phone Number?
There are many methods available to create an Apple ID without phone number verification including:
- Method 1: Get a Virtual Phone Number for Apple ID verification
- Method 2: Use a temporary number
- Method 3: Use a friend’s/ family member’s number
- Method 4: Use email address only
Method 1: Get a Virtual Phone Number for Apple ID verification
The first reliable method available to make an Apple ID without phone number verification is signing up using a virtual number instead of using your personal number.
Get Virtual Phone Number for Apple Id Registration Online.
Verify your Apple account with virtual phone number and keep your info private.
Select numbers :
How to Get a Virtual Phone Number for Apple ID verification?
There are many providers in the market that provide cloud-based virtual phone numbers of many countries in different price ranges.
To get a virtual phone number for Apple ID verification follow the steps:
- Sign up for KrispCall and log in.
- Select the preferred country phone number.
- Submit the necessary documents (if required). and make payment.
- Start receiving verification codes, calls, and messages.
Benefits of Using a Virtual Number for an Apple Account
Using a virtual number instead of a private phone number while creating an Apple account has several benefits. Some of them are as follows:
- Privacy: With a virtual number, you can maintain your privacy as you don’t have to provide your private number to create an Apple account.
- Flexibility: You can obtain virtual numbers from different countries as it is free from location restrictions.
- International Access: Virtual numbers are independent of physical phone lines, hence you can obtain an Apple verification code from any device no matter where you are. It is a good option if you travel frequently to other countries.
- Separate communication: If you are using an Apple account your business use, then using a virtual number will help to keep your business communication separate from your private communication.
How to Create a New Apple id Account With a Virtual Number?
You can create a new Apple id account from your device, iPad, Mac, online, or App Store on your device.
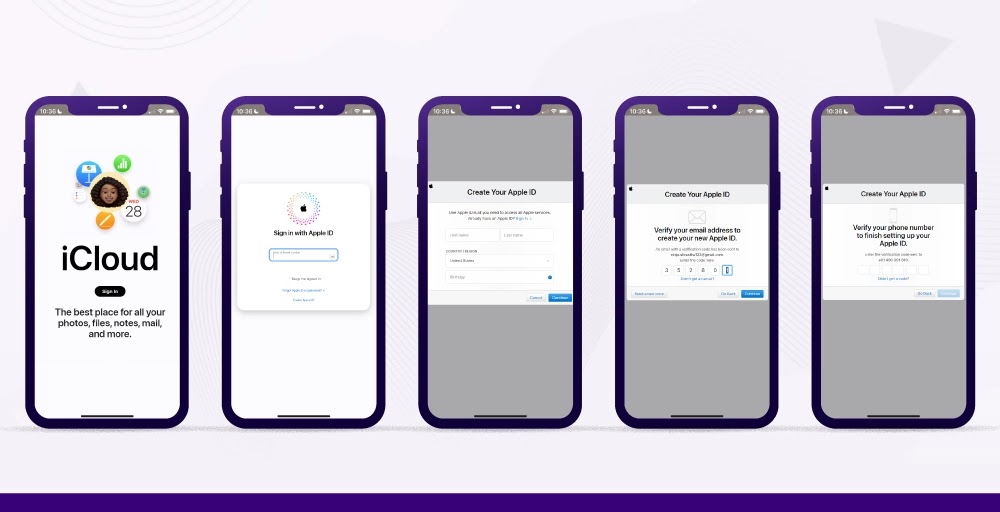
Follow below step-by-step guide to set up a new Apple Id with a virtual number:
- Go to iCloud and click the “Create Apple ID” option.
- Enter your full name, country/region, and birthday.
- Enter your personal valid email address. The email address will be your new Apple ID.
- Enter and confirm the password.
- Enter the virtual phone number and select the “text message” or “phone call” option to verify your phone number.
- Enter the verification code sent to your email address and click “Continue”.
- Enter the verification code sent to your virtual phone number and click “Continue”.
- Receive your new Apple ID after completing the verification step.
Method 2: Use a temporary number to Register Apple Id
A temporary number is another alternative available to make an Apple Id without a phone number. A temporary number is a disposable cloud-based number often used to receive a verification code. Many websites provide temporary numbers of different countries like the USA, UK, Canada, etc for free.
Among these websites, getfreesmsonline is one. Getfreesmsonline provides temporary numbers for Canada, UK, and US. You can choose any number from the list to receive the account verification code.
Follow the steps below to use temporary phone numbers for creating a new Apple Id account.
- Select a reliable temporary number provider like getfreesmsonline.
- Choose any number from the list.
- Enter the selected temporary number on the phone number option on Create an Apple Id page.
- Refresh the provider’s page and find a verification code.
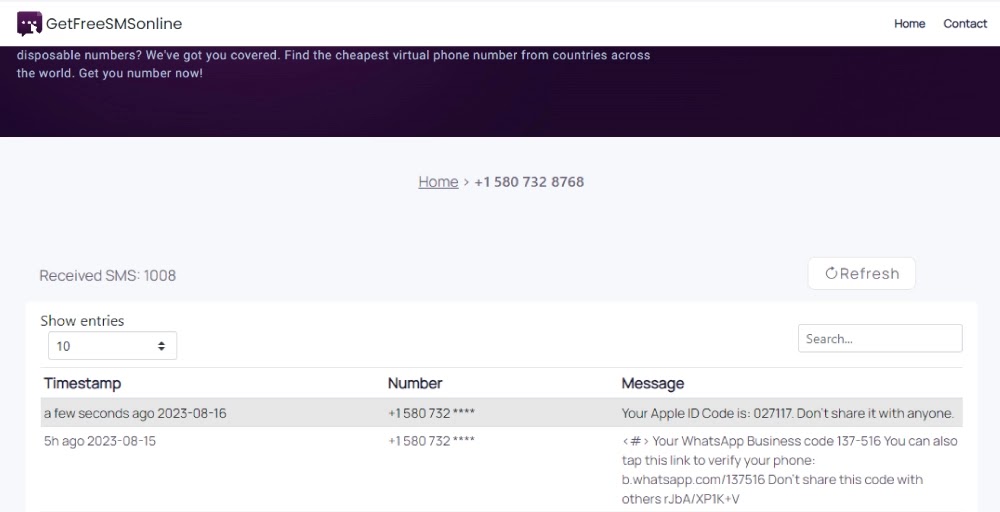
- Enter the phone verification code.
- Receive your new Apple ID after completing the verification step.
Note: Apple can reject temporary numbers from untrustworthy websites. So, visit many websites and try out their temporary number. Then, select the temporary number that Apple accepts to send the verification code.
Pros
- Maintains privacy as you don’t have to provide your phone number
- You won’t receive promotional messages on your phone number
- It is a good option if you are accessing Apple Id for a short period
- It enables you to access apps on your Apple device without sharing your private number
- It is a cost-effective solution
Cons
- Temporary numbers are short-lived
- It is difficult to recover an account if you lose access to your temporary number since the verification code is sent to a registered temporary telephone number that is no longer functional
- Apple may reject temporary numbers from some providers
- You can’t enable two-step verification security measures
Method 3: Use a friend’s/ family member’s number
You can opt for your close friend’s or family member’s phone number to get an Apple Id if they are willing to provide their phone number to you.
Creating a new Apple Id with your friend’s or family member’s number is the same process as creating a new Apple Id with a virtual or private phone number. You only need to enter your friend’s or family member’s number in the phone number instead of a virtual, temporary, or private phone number.
Pros
- The number is legitimate so Apple will not reject it
- It is a good option if you don’t want to use a cloud-based solution
- You can always look for your friends or family members in case you lose access to your account
- It maintains your privacy as you don’t need to share your private number
Cons
- It threatens your friends or family member’s privacy
- Your friends or family members will receive unwanted messages on their phone numbers
- Constantly rely on your close ones to get a verification code
Method 4: Use email address only
Another method to create an Apple Id without a phone number is completing the verification step just by verifying the code sent to the respective email address.
Here is the step-by-step guide to creating an Apple Id with an email address only:
- Go to iCloud and click the “Create Apple ID” option.
- Enter your full name, country/region, birthday, email, phone number, and password.
- Enter the verification code sent to your email address and click “Continue”.
- Now you will be required to enter the verification code sent to your phone number. Choose the “Didn’t get a code” option.
- Select the “Verify later” option.
- Your new Apple Id is now ready.
Note: You’ll be able to verify your account via email instead of your phone number, plus you’ll have the option to set up two-factor authentication later.
Pros of using an email address to get an Apple Id:
- You can enter any phone number including the wrong number during the sign-up process.
- It protects your privacy as you don’t have to share your phone number during the signup process.
Cons of using an email address to get an Apple Id:
- It isn’t a safe method.
- You can’t set up two-factor authentication.
How to Create an Apple Id on different devices?
You can create an Apple ID on the Apple ID website, IPad, or Mac.
I. Creating an Apple ID on the Website
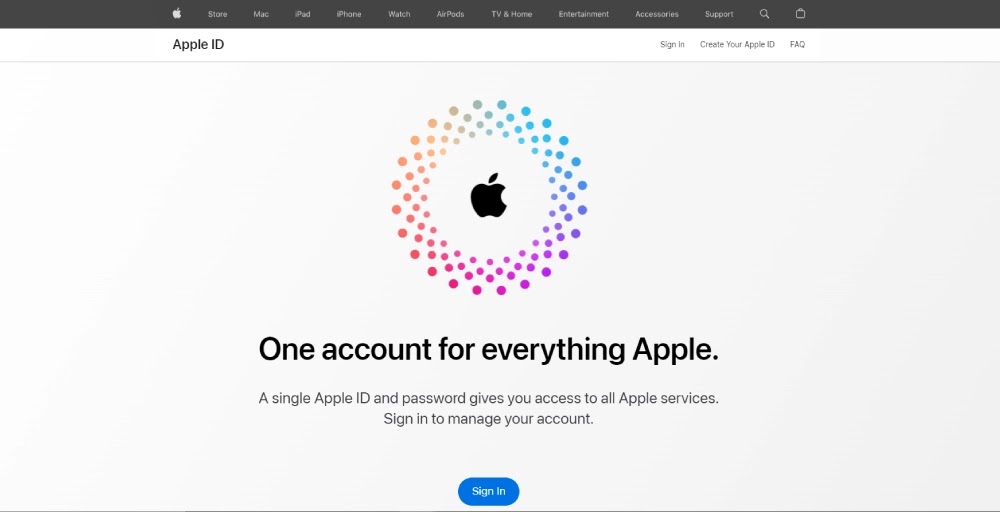
Here is the step-by-step to create an Apple ID on the Apple website:
- Go to appleid.apple.com or iCloud and click the “Create Apple ID”.
- Enter your full name, country/region, birthday, email address, password, and phone number.
- Type the Captcha and click on the “Continue” button.
- Enter the verification code sent to your email address and phone number.
- After code verification, you will receive a new Apple Id. You can use your new Apple Id to sign in to any Apple service.
II. Creating an Apple ID on macOS
Follow these steps to create an Apple Id on MacOS:
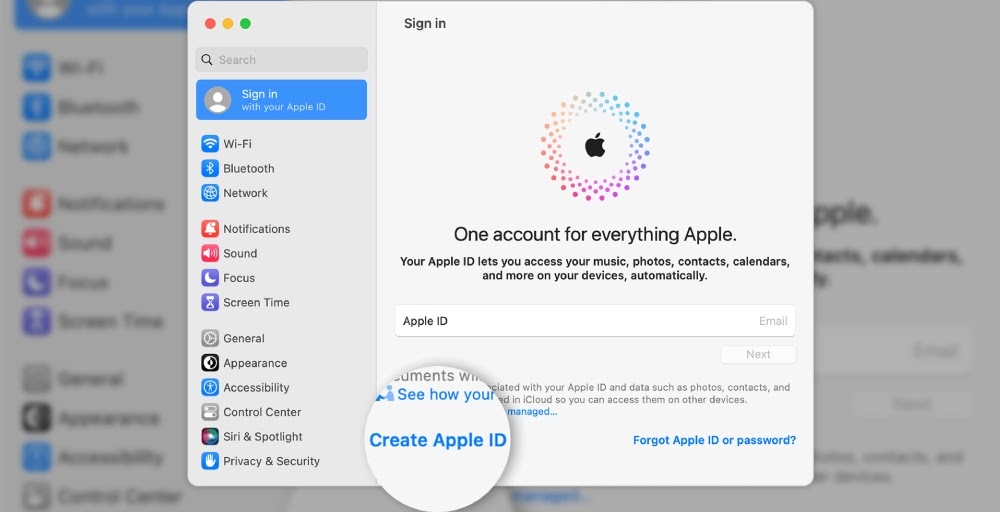
- Open System Preferences or system settings on your Mac.
- Click on the “Sign In” button and choose the “Create Apple Id”.
- Enter your full name, country/region, birthday, email address, password, and phone number.
- Enter the credit card details or choose the “None” option.
- Enter the correct code sent to your email address.
- You will now receive your new Apple Id.
III. Creating an Apple ID on IPad
Here is the step-by-step to get an Apple ID on Ipad:
- Open the settings menu.
- Select the “Sign in to your iPad” menu.
- Select the “ Forgot password or don’t have an Apple ID?” menu.
- Enter first name, last name, email, date of birth, password, and phone number.
- Enter the activation code sent to your email address and phone number.
- After code verification, you will receive a new Apple Id.
Disclaimer: You can also create a new Apple account by bypassing the phone number verification requirement during setup. For this, you must click on the “Didn’t get a code” option after finishing the email address verification and then tap the “verify later” option.
Conclusion
To sum up, it is possible to set up an apple id without a phone number using above mentioned alternative methods- a virtual phone number, a temporary number, a friend’s or family member’s number, and an email address only.
Although these methods allow you to get an Apple Id, it is necessary to consider the consequences and drawbacks of these methods. The consequences can be threatening to one’s privacy, complications to retrieve an account, constant dependence on others, unable to set up two-factor authentication among others.
Among these alternatives, using a virtual phone number is the best method. You can get a virtual number for Apple account verification from KrispCall. KrispCall virtual number covers 100+ countries and comes with many advanced VoIP features to enhance communication and privacy.
FAQ
Can you create an apple id without a phone number?
Yes. You can create an Apple Id without a phone number. You can use a virtual phone number, a temporary number, or your friend’s or family’s number to create an Apple account.
Can I have two Apple IDs?
Yes, iOS supports multiple Apple IDs on a single device, but you can only be actively signed into one at a time. You can switch between these Apple IDs in your device’s settings. Go to Settings > Apple ID > Apple ID and select which one is used for various services like the App Store, iCloud, and iMessage.
Can I create Apple ID with Gmail?
Yes, you can create Apple ID with Gmail by following the below steps:
– Go to Settings > Apple ID > Create Apple ID.
– Enter your Gmail address and create a strong password.
– Enter your personal information, including your first and last name, birthday, and
country or region and tap Continue.
– Apple will send a verification code to your Gmail address. Enter the code and tap Continue.
– Your Apple ID has now been created.
– Follow the on-screen prompts to set up your Apple ID account.